
Blamcon ARC (Advanced Remote Control)
The Blamcon ARC (Advanced Remote Console) allows you to customize all functions of your Blamcon Light Gun. Customize key bindings, set your player config, even set your cursor smoothing algorithm. Blamcon ARC will get the most out of your light gun and nail those high scores!
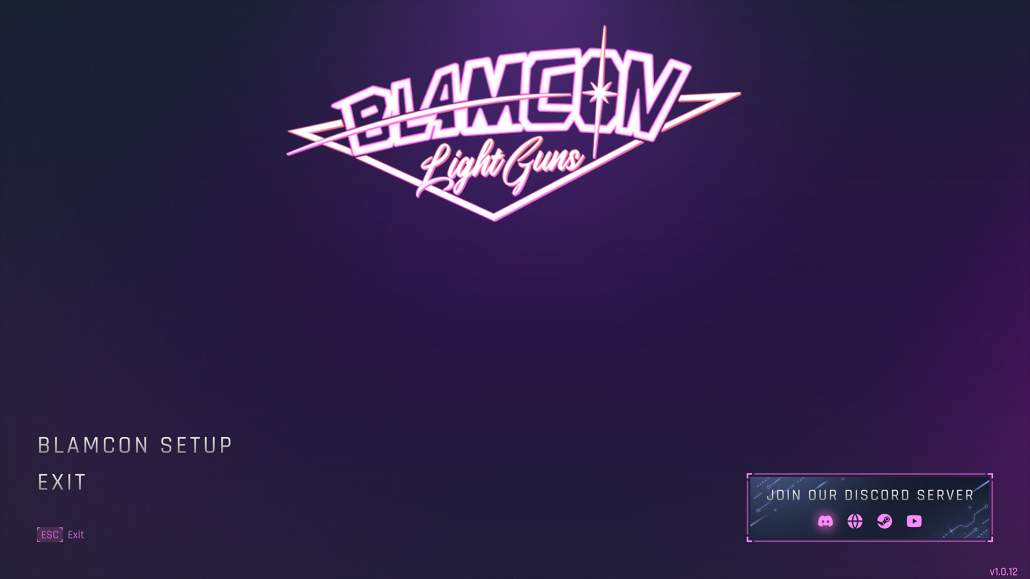
Home Screen
When you open ARC it will default to the home screen. The home screen is where you can plug in or change your Blamcon devices before getting into the configuration screens. If you ever unplug or change Blamcon device in ARC you will be returned to this screen so ARC can reconnect to your devices. This is because the setup and configuration screens need a connection to your Blamcons to read and write settings.
I don’t see any information
1. Try exiting ARC, unplugging your Blamcon, plugging it in again, and run ARC again
2. When you plug in your Blamcon do you hear a USB connection? If your building it yourself make sure your USB port is wired correctly. The best way to test this is to plug a USB cable directly into the core
3. Try a different USB port
I downgraded my firmware and ARC won’t work
This is because when downgrading firmware sometimes there’s ‘rubble’ in the memory from features that don’t exist. Hold B on your Blamcon for 5 seconds offscreen to enter menu. Navigate to the orange menu by pressing the A button, press trigger, use the A button until you see 4 flashes and rumbles, press the trigger 3 times (go to factory reset, enter factory reset, confirm factory reset). Then try ARC again
About
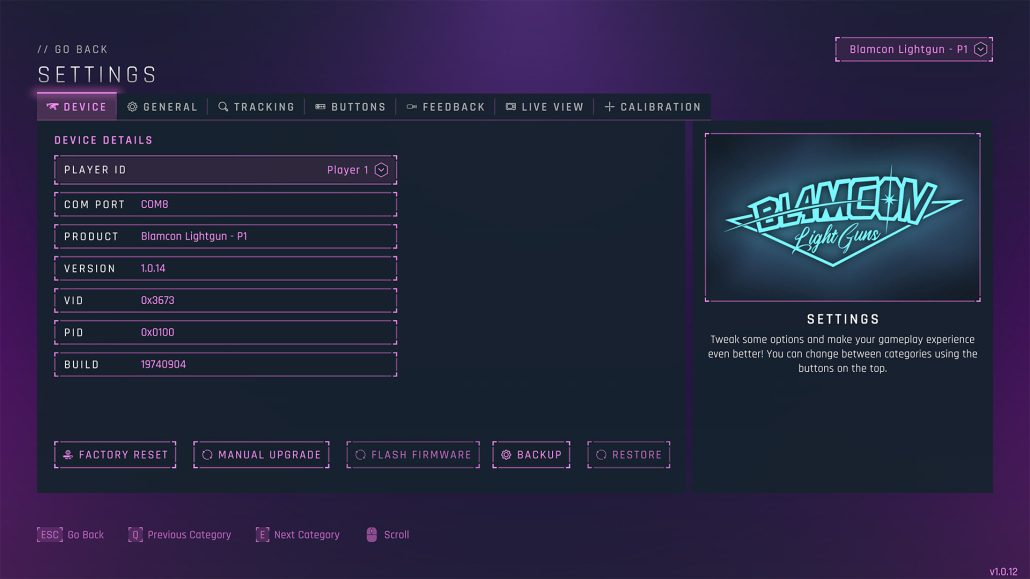
This is where you access all of the information and features of your Blamcon light gun. At the right top you can see your currently selected light gun, click this to open a dropdown and select between currently connected devices. If you do not see a device here go back to the home screen and try to unplug/replug your device or connect it to another USB port.
Device Details
Device details show you the key information about your currently selected light gun.
Player ID | Select what player the light gun is assigned as in a dropdown
Com Port | The serial port your Blamcon is connected to
Product Name | The name reported by your light gun
Firmware Version | Your current firmware version
Vendor Id/Product Id | These identify your device to your computer
Build | The build number of the firmware
There’s also a number of buttons at the bottom of the info panel that perform specific firmware functions.
Factory Reset | Reset the Light Gun to factory settings for current firmware version
Manual Upgrade | Puts the light gun into mass storage mode (USB drive). From here you can drag and drop a new firmware version
Flash Firmware | If this button is active there is a new firmware version ready. Click on it to upgrade to the latest firmware
Backup | Backup the current settings on the gun, great if you want to play around
Restore | Restore the latest backed up settings to the gun
My USB resets when it rumbles
This is a rare case when using a more powerful rumble but you can set the rumble to ‘low’ to reduce the power consumption. Some computers have a low cap on the current the USB bus can draw and going over this causes it to reset. You can also just disable rumble if it’s not important to you or change rumbles. The 7mm encapsulated rumble we now use with Blamcon is quiet, strong, and uses very little current.
My cursor won’t move!
If emulation mode is set to ‘Gamepad’ the mouse won’t work, and most games will not work with this enabled. This mode is for compatibility with some emulators. If you want to test it try Blamcon Shooting Gallery as it supports both Mouse and Gamepad mode.
I have no recoil
Make sure recoil mode isn’t set to ‘disabled’. This has gotten me a few times. And, of course, make sure your recoil power adapter is plugged in.
Selector with 3 Button Blamcon
You can set a button combo like A+B to toggle your recoil mode.
General
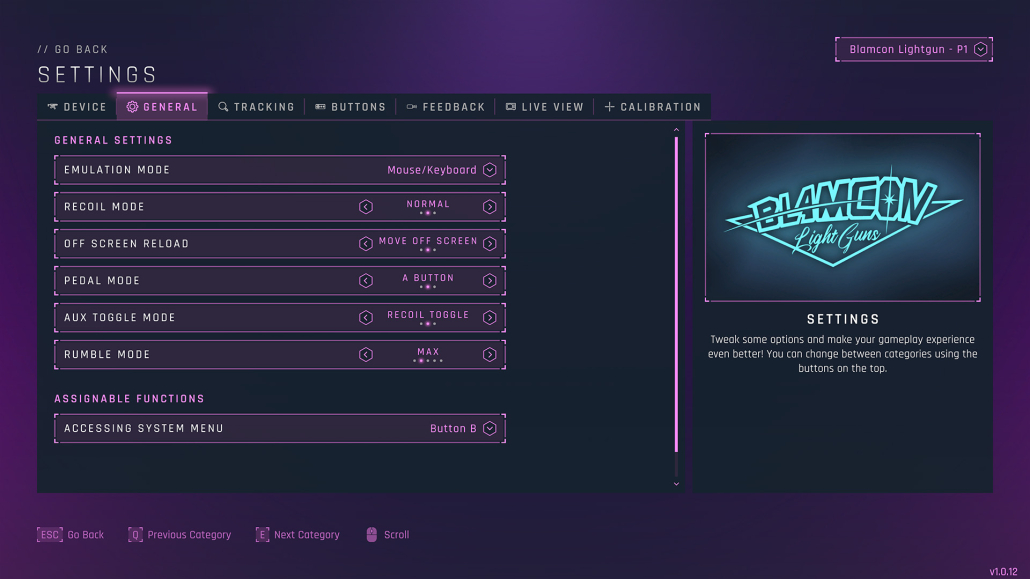
Set up the way your light gun behaves and responds and assign keys for critical functions.
General Settings
Emulation Mode | Some older emulators require your Blamcon to be a ‘gamepad’, this will allow you to set your Blamcon to act as a gamepad. Note when you do this the mouse cursor will stop moving
Recoil Mode | Allows you to select between ‘disabled’ (no solenoid), ‘semi’ (one trigger press per solenoid actuation), ‘full’ (solenoid will go all day), and 3 round burst (this is a hardware mode and will shoot 3 times in the game and 3 solenoid actuations).
Off Screen Reload | Some games require the ability to reload your weapon by shooting your light gun off screen. This setting allows you to enable this feature so you can send a reload command as the camera points off screen. Disabled – turned off, Move Offscreen – Point your camera off screen to reload, Shoot Offscreen – Move the camera offscreen and pull the trigger to reload
Pedal Mode | The ‘pedal’ button on the core is assignable and used for many things, like the Magazine on the Vyper or MF cell on the Fallout Laser
Aux Toggle Mode | Want to use your selector switch as a button? This is the way. Set it to ‘mapped key’ and now you can assign it in the Buttons tab
Rumble Strength | Adjusts the PWM (power width modulation) value to vary the strength of the rumble motor, or to disable the rumble all together
Assignable Functions
Device details show you the key information about your currently selected light gun.
Accessing System Menu | Holding this to access the in-gun menu to change players, recoil mode, or many other functions. Learn more here.
Toggling Recoil Mode | If Aux Toggle is set to anything other than ‘Recoil Toggle’ you will have no way of selecting between fire modes in game. This allows you to set your recoil mode (selector switch) to an assigned key. You can also set this to a key combo (Trigger+A for example) to get a selector function in a 3 button Blamcon.
Which LED orientation should I use?
In all cases except when you need it for compatibility reasons 2-Up 2 Down is better. It is easier to set up, easier to correctly orient, and just works better.
Tracking
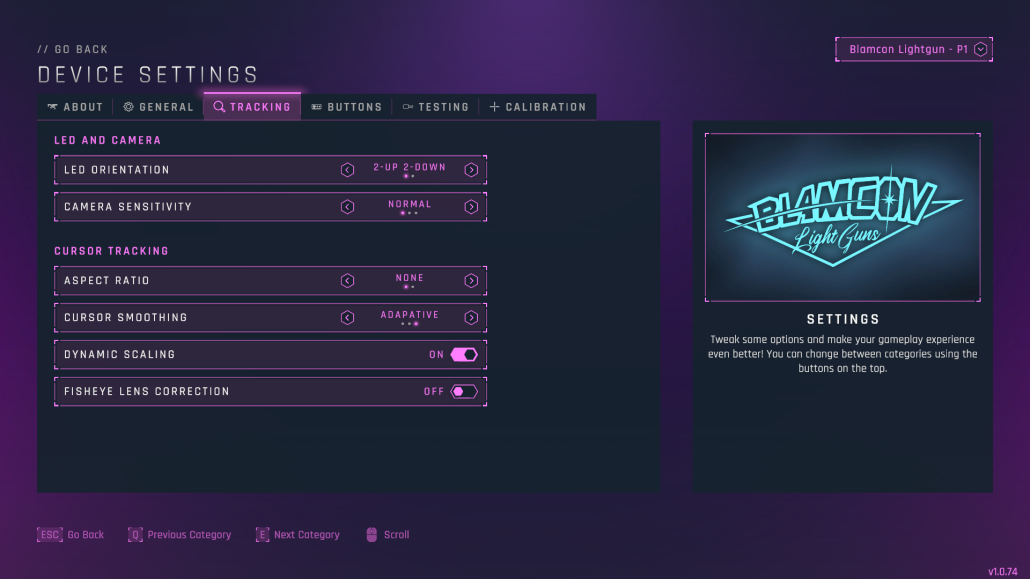
Tracking is how the IR camera in the front of your Blamcon tracks the light guns position in 3D space using the 4 IR emitters as references.
LED and Camera
LED Orientation | Blamcon supports 2 configurations “2-up 2-down” is the easiest and best configuration where you have 2 IR emitters on the top and bottom edge of the TV and “Crosshair” Is where the LEDs are on each of the four edges of the TV.
Camera Sensitivity | This is how sensitive your IR camera is to the emitters. It is rare you need to adjust this but if you are using weak emitters you can increase the sensitivity
Cursor Tracking
Aspect Ratio | Some games still need to be played in the letter box format (4:3) where your screen is squished between two large black areas. The Aspect Ratio setting can be used to correct the cursor tracking for games that are displayed in a letterbox 4:3 aspect ratio. The default setting is no aspect ratio is applied (recommended). You can calibrate a dedicated 4:3 profile in the calibration tab for 4:3 games.
Cursor Smoothing | By default the cursor smoothing uses an adaptive algorithm to smooth the movements and steady the cursor. Averaging is another algorithm you can try. If you disable cursor smoothing, you will notice when aiming that the cursor is very jittery, this is a result of natural human body movements, but has the most instant response. Sometimes the game itself has smoothing and turning off cursor smoothing can help responsiveness.
Dynamic Scaling | Dynamic scaling will adjust your calibration on fly when it detects that you’ve changed position, keeping your zero. If you are having tracking issues, you can try turning this off (not recommended).
Buttons
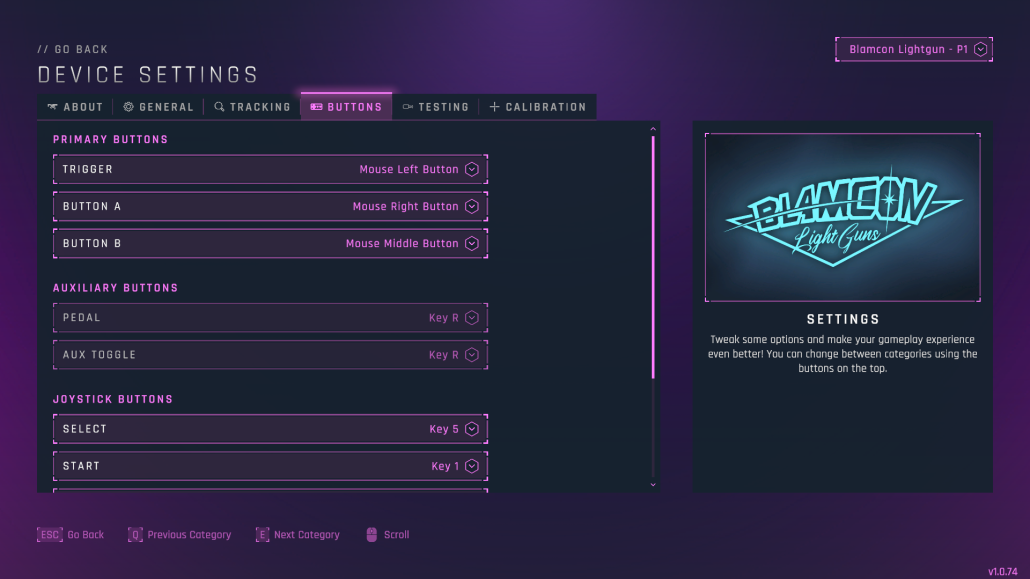
This tab contains all of the buttons that support assignable key bindings. These settings are determined by which emulation mode you’ve have selected for the device. For example, the available keys for binding in Mouse/Keyboard mode is different from the buttons available for assignment when in Gamepad mode. Each emulation mode has it’s own set of default key bindings. Changing or switching emulation modes will not erase or overwrite the key bindings for other modes, they are persisted so you don’t have to always change or update the bindings.
Primary Buttons
These buttons are required for proper light gun operation. You need at least a trigger, A, and B button for proper a Blamcon experience.
Auxiliary buttons
These are ‘extra feature’ buttons that are nice to have but not required.
Pedal | This is an assignable key, it is only changeable if you change ‘pedal mode’ to assignable in the general settings
Aux Toggle | This is your selector switch for recoil mode, it is only changeable if you change ‘aux toggle mode’ to mapped key in the general settings
Auxiliary buttons
Joystick inputs map to the Blamcon Joystick module but they can be mapped to other inputs. The inputs from these buttons can also be used as extra buttons and mapped to other functions here.
Testing
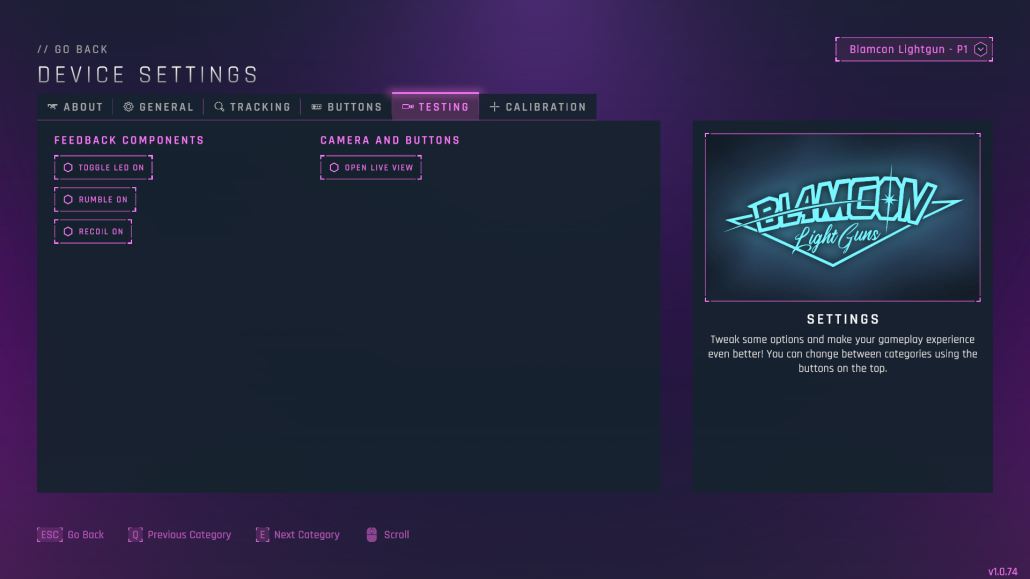
This tab can be used to test the components in your light gun. This can be useful if you want to ensure all the components are functioning properly i.e. you are a building or repairing your own Blamcon.
Feedback Components
about this
Toggle LED On | Turns on the addressable LED to red, click again to turn off
Rumble | Activate the rumble motor once
On | Activate the recoil once if your gun is set to semi-auto, or continue firing until the trigger is pressed if it’s set to full-auto
Camera and Buttons
Click the ‘Open Live View’ button to go to the live view page to test the camera and buttons
Are my LEDs working?!?
There’s 2 good ways to check:
1. Bring the gun right up to the LED, if it can’t see it there’s a good chance it’s not working.
2. Use your phone or a digital camera to look at the LED, phones and camera can often see IR emitters as visible light on the view screen
My LEDs aren’t working from different angles
LEDs have a ‘cone’. The LEDs we use have a 60deg cone matching the camera viewing angle, but if you’re high or low to the TV or the TV is very big you may find you have to angle the LED bar a bit up or down, this screen is a great tool for dialing that in.
Live View
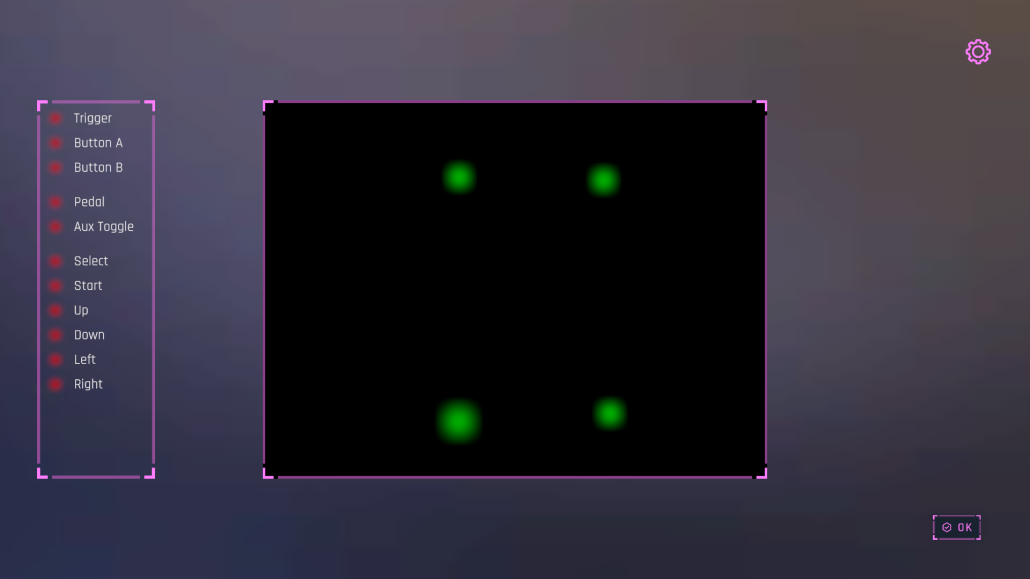
Test all the input functions of your light gun. In this view, you’ll be able to test whether all the devices inputs are functioning correctly by talking to the device directly. This is independent to the device configuration or emulation mode.
Camera View
In the right panel, you can point your camera at the screen to see whether the camera can detect and report on all of your LEDs around your screen or TV. It’s important to point out that the camera can only report on four LED light sources. The camera panel will mirror the view of the camera so if you move the camera around it will move the LEDs around to reflect how the camera is reporting them. Remember it’s a mirrored view, so up is down and left is right 🙂
This view can be very helpful for not just testing your camera functioning, but also whether your LED setup is working properly. For example it can be very useful for visualizing or detecting abnormal conditions such as:
Weak LED | An LED might not show up if it’s under powered, or if the room lighting is too bright. If you see missing or flickering LEDs they may be too dim
Missing LED | If LED is powered correctly or pointed in the wrong direction, it might not be viewable if the angle between camera and LED is too great.
Reflected LED | If your TV or screen are mounted onto a reflective surface like glass, you might find a stray LED in the wrong position.
Unintended light sources | If you have strong bright lights near the screen or in the camera view, you might find it will show up here as a ghost LED.
Buttons
On the left panel, you can check to see if all of your buttons are functioning and reporting correctly. To test a button simply press it and it should light up on the panel. A full set of buttons are listed for testing, however your Blamcon model may not have all buttons available.
How can I use my 4:3 profile in game?
1. The in-gun menu lets you select the 4:3 profile
2. f you are using a tool that supports serial commands you can change it on the fly as the game loads, learn more here
Calibration
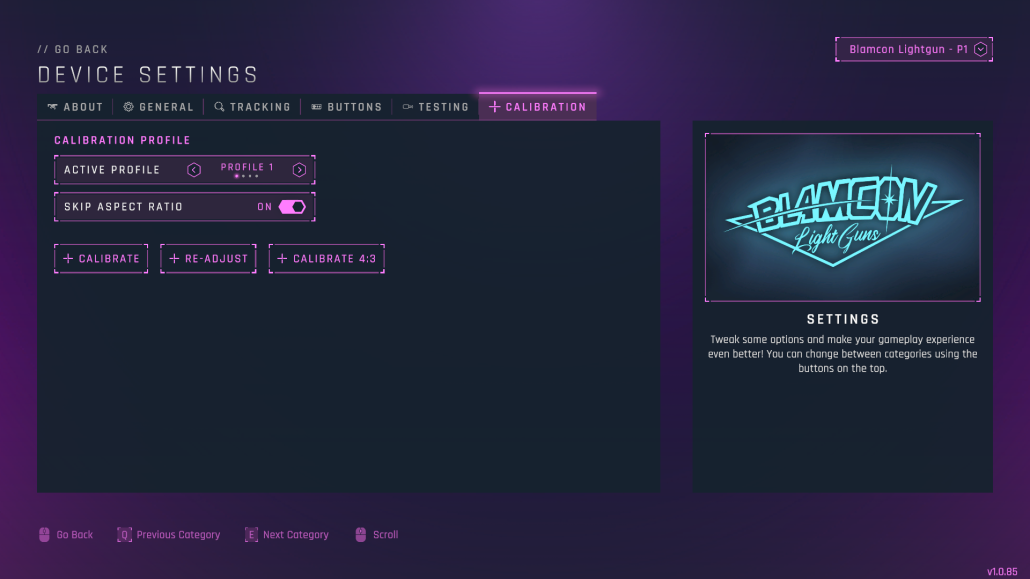
This is where you calibrate the tracking system for your Blamcon light gun. All setups are different, so your Blamcon won’t be entirely accurate (unless you get really lucky) until you’ve done this.
The Blamcon gives you the ability to configure up to 4 different calibration profiles, calibrating again using a profile will reset it. So make sure you’ve selected the profile you want to calibrate in the previous calibration tab BEFORE calibrating here, you can press ESC on your keyboard or shoot ‘OK’ to exit this screen at any time.
Calibration Profile
Active Profile | Tab between the 4 savable profiles for this player on this gun. Each player gets their own 4 profiles and they can be switched using the in-gun menu or here any time.
Skip Aspect Ratio Mode | When enabled this ignores the 4:3 aspect ratio mode, this is for some edge cases to help with some tools. Unless you know please leave this disabled
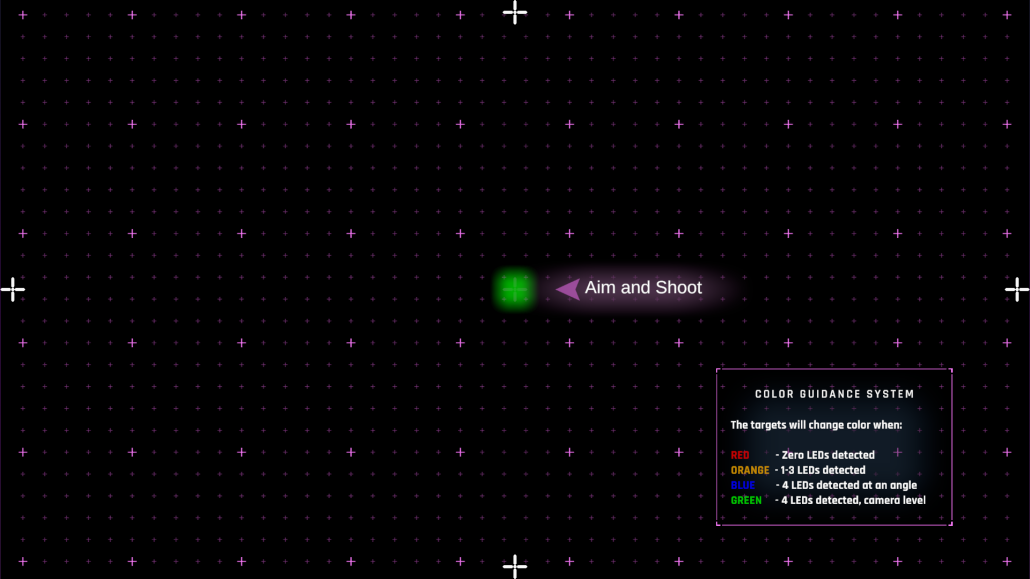
Hey! It made a little jump
1. Yup, it will do that at times as it can be resetting a programmed offset, just use the A/B buttons to dial it in and off you go.
My center point moved
1. Depending on how far the edges were off, that can happen, just dial it in again. There’s a push/pull to this, remember you’d not just adjusting the 5 points but the movement BETWEEN the points, including the angles, so it’s not fully linear. Just move between the points dialing it in until it’s perfect, sometimes it may take 2 times around. Remember this screen is for that perfect pixel accuracy.
My little brother aims differently!
Yup, this happens with the real thing too, some people are left eye dominant, some right. There are 4 profiles for each player you can save in your light gun and you can change them on the fly using the in-gun menu. Remember to reserve a slot for 4:3 if you’re using emulation!
Calibrate
This is where you get your Blamcon shooting straight by shooting the points to calibrate your Blamcon for your TV and point of aim.
Shooting the points
Getting accurate shots here is important. Make sure you’re roughly where you want to be when you’re playing and in the same stance for the best results. If you don’t think you shot the 5 points well you can do it over until you’re happy. A great way to test this after is in Blamcon shooting gallery.
Tips
Be Smooth | Don’t hold your breath! breath normally and before you shoot take a slow exhale and squeeze, don’t jerk, the trigger. Feel if you ‘pulled the shot’ by thinking ‘did the gun move while I shot?’, ‘did I shoot the right place?’, the human brain is very good about knowing intuitively if you got the shot right.
Fisheye Distortion | If you’re using a fisheye lens it can have an effect on accuracy at the edges. If it ‘jumps out a bit’ this is totally normal on certain sizes of TVs. You can dial this back in the ‘re-adjust’ menu so don’t worry about it.
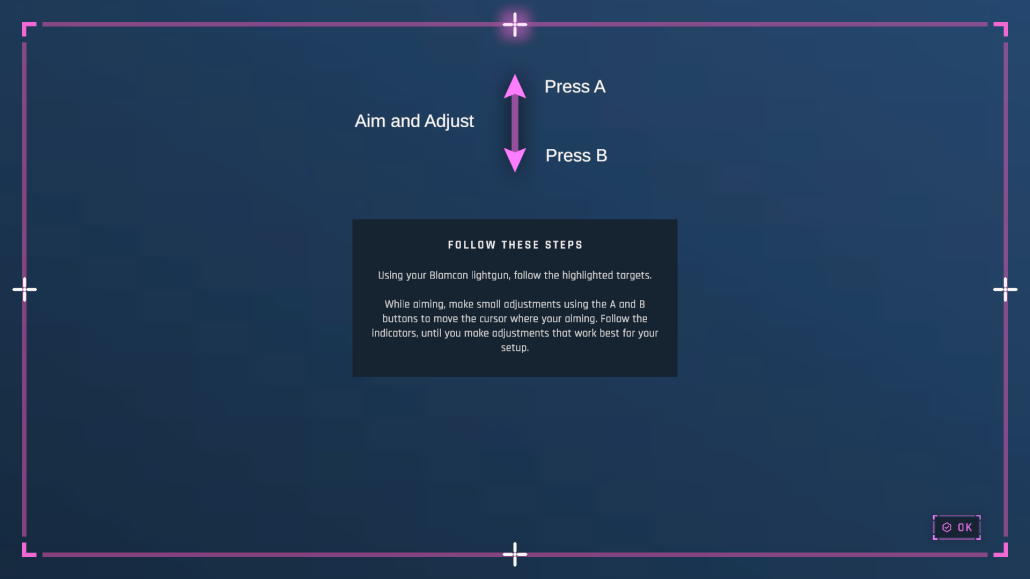
Re-Adjust
This is always a good idea to do if you can about that last big of accuracy. It’s very hard to shoot 5 points perfectly, not all of us are Annie Oakley, so any problems in the calibration will lead to inaccuracy in your profile. Offset calibration has you covered, letting you dial in that last bit of accuracy and compensate for any inaccuracy during the primary calibration process. Do that calibration FIRST though, this is a tool for dialing it in, not doing the full calibration.
Using this page
There are 4 points on the screen, one highlighted at a time. Aim at each point with your crosshair and use the A/B button to dial it in. Only worry about the axis the arrows are showing, not the other. So if you’re calibrating for a top and bottom point you only care about where it is on the vertical axis. You want to get it where the cursor is exactly on the LINE the crosshair is on. After going through all 4 points they should converge where it’s correct on the horizontal and vertical axis for all four points. If it’s still off there’s a chance you didn’t do your primary calibration properly, or at all, so go back and do a primary calibration if you just can’t dial this in.
Now you’re done configuring your Blamcon why don’t you try Blamcon Shooting Gallery FREE on Steam and see how your Blamcon performs?